Waveletes
To accomplish this task using what are wavelets, which are a type of Fourier transform. The wavelet transform is to compare the signal with certain wavelet functions, which are obtained from the mother wavelet. The comparison allows to obtain the coefficients are interpretable and further manipulation.
PyWavelets
To carry out the compression used pywavelets which is a wave abirto code and serves to transform python. It is necessary to use this module you need to install pywt. To do this we can just download it from the terminal with the following line:
sudo apt-get install python-pywt
Process
To do this work with the Discrete Wavelet Transform, with which we obtain a new representation of the image to be treated.
Within this process the TWD provides a matrix of coefficients, which are the four wavelet coefficients:
- approximations
- horizontal coefficients
- vertical coefficients
- diagonal coefficients
In the following image shows how the coefficients are obtained:

Haar transform used to treat 2-dimensional images, which we use to get our 4 coefficients.
The process is performed as follows:
- Enter imgagen you want to compress
- After you get the size in bytes of the image from the original image
- We estimate each of the coefficients (approximations, horizontal, vertical and diagonal)
- After obtaining the coefficients, we apply them within a binary filter for so the new images.
- Also after that calculate the inverse image to apply the compression process.
Below will show some of the tests performed with different images.
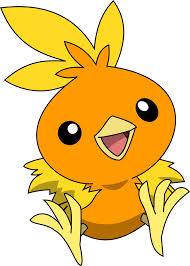
Test 1:
Approximation coefficient

Horizontal coefficient

Vertical Coefficient


Diagonal Coefficient


Finally this is the compressed image below shows the change that was from one image to another. (reverse image)


Here attached another test that you make with a different image which contained a little more color, and is slightly heavier than the first.
Test 2:

Approximation coefficient

Horizontal coefficient

Vertical Coefficient

Diagonal Coefficient


According to the tests you make think it depends on the weight of the image, so that when compressing it look as similar to the original, another thing I noticed is that it also depends on how well defined this image, because for example in the first test can fully appreciate the detail between one figure and another, while in the second test is different.
Another thing you can do is check if the compression works with images that contain a lot of noise and not lost many details of the original image. Below I made a small test this:
Test 3:

Approximation coefficient

Horizontal coefficient

Vertical Coefficient

Diagonal Coefficient


And the reverse image:


Here attached the code you use.
References
- http://en.wikipedia.org/wiki/Haar_wavelet
- http://www.pybytes.com/pywavelets/
- https://en.wikipedia.org/wiki/Wavelet_transform
Aquí las reversas y los detalles no en realidad son de interés, sino la comparación entre original y comprimida. Hubiera sido bueno discutir los tiempos de ejecución. Las referencias carecen formato. 5 pts por el reporte.
ResponderEliminarEl código ocuparía comentarios (por mínimo tienes explicación por pedazos) y alguna contribución tuya. Pero pues, que sean 6 pts. Te veré en segundas ;)